Skip navigation
For over 40 years, Intelligent PCB Manufacturing
Automation Software
Be production ready in minutes, not days.
Using COLOR to identify component groups assembly step groups, polarized components, etc. to aid assembly, inspection, rework, etc.
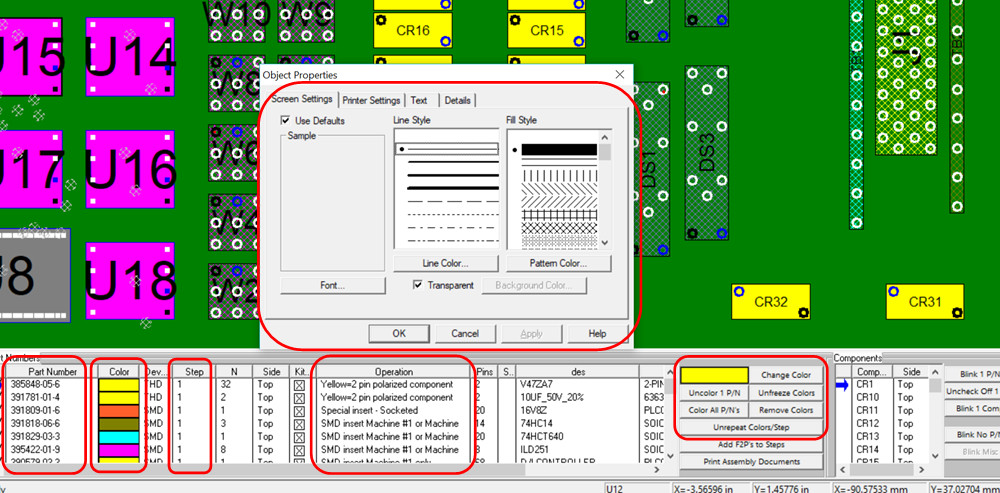
With the Unisoft software you have full control to change the Colors of every component on the PC Board.
- Change all component colors automatically by part number.
- Change
component colors individually by part number.
- Or within a part number have individual components colored different colors.
The following is a brief explanation on some of these options. We recommend that you go online with us for some training to understand these and other options in more detail.
AUTOMATIC COLOR PROPERTIES CHANGES TO ALL PART NUMBERS:
When
the COLOR ALL P/N'S feature is used it will assign a Color automatically
to each part number.
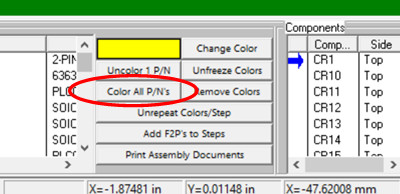
This feature can be use in
conjunction with any step number that has been assigned in the “Step” field.
When this feature is used it will override any Color properties you assigned if
you used the manual properties feature. These automatic Color changes will
be shown on the display and also will be the component colors printed via the PRINT ASSEMBLY DOCUMENT by Step feature on the ASSEMBLY SHEETS/1ST ARTICLE (OPEN SMART COLOR
OPERATIONS) menu.
When you have the part numbers you wish colored then click
FREEZE
COLORS and that will freeze the colors on the display
and this will prevent the part number colors from changing if the part numbers
are re-sorted.
At this point using various options available you can print out for example
kitting labels and process assembly documents like those below.
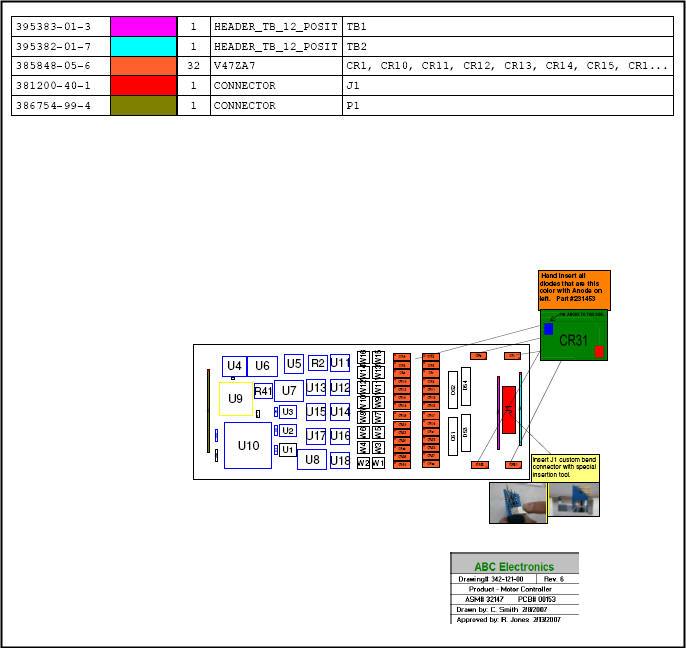
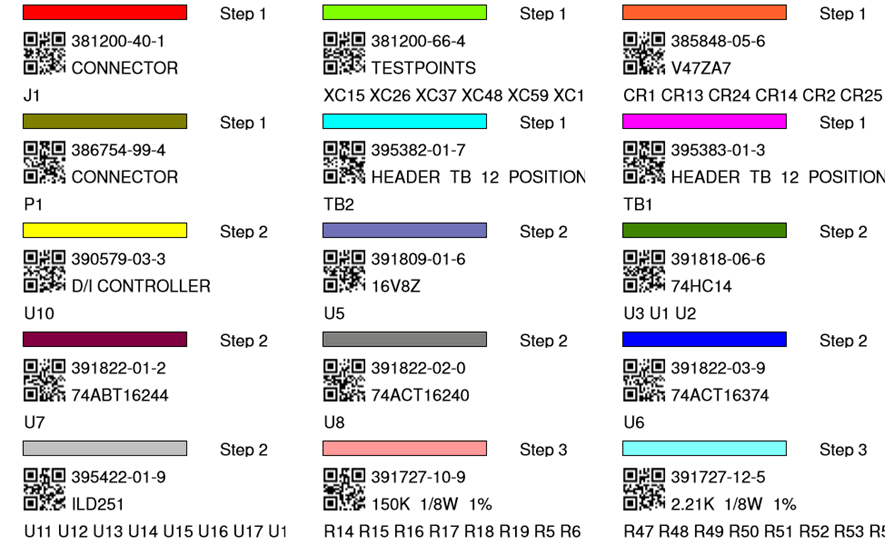
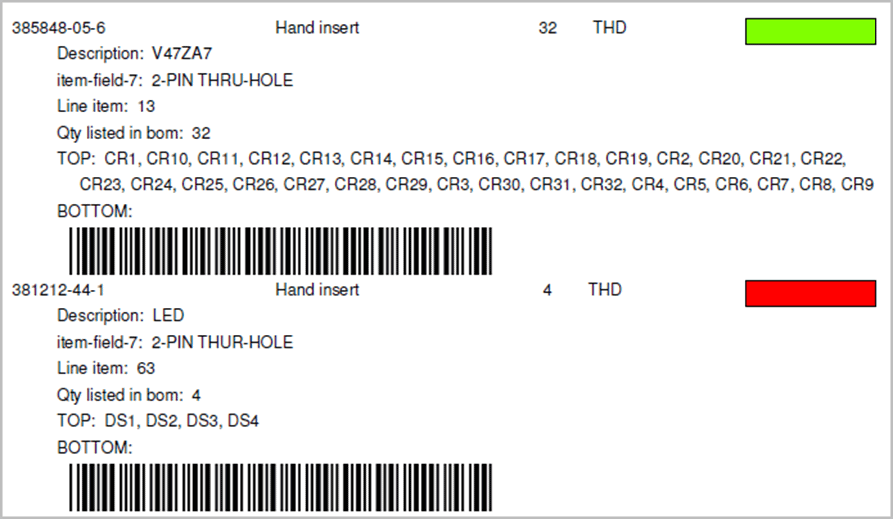
Click here for more information on creating process assembly documents and kitting labels.
To remove any Automatic Color properties click REMOVE COLORS and select the options you wish accordingly and click OK. Any Automatic Color properties assigned are removed and any manual properties changes previously assigned will be shown on the display and are also the properties printed via the PRINT ASSEMBLY DOCUMENTS by Step feature.
AUTOMATIC COLOR
AND MANUAL COLOR
PROPERTY CHANGES TO A SINGLE OR MULTIPLE PART NUMBERS:
You can also Color a single part number only any color
by clicking the
COLOR 1 P/N
button
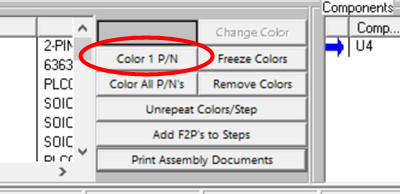
then click the CHANGE COLOR button and select the color you want. This can be repeated for additional part numbers for example if you want multiple part numbers the same color.
When you have all the part numbers you wish colored then click FREEZE COLOR and that will freeze the colors on the display.
An example of using this feature follows:
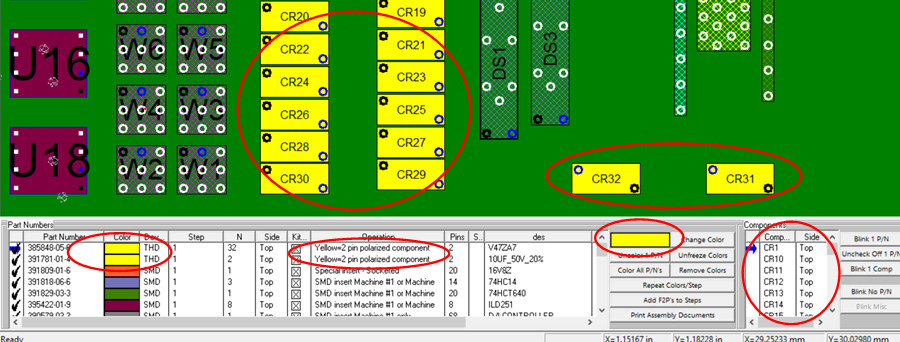
For identifying components that are polarized below is an example of how to highlight these components illustrated. This is a useful feature of the Unisoft software used by contract and OEM electronic manufacturers.
You can color the part numbers that are polarized a single color for example we have used yellow below then you can also optionally add a note and isolated with the step number. Below we have used a note "Yellow=2 pin polarized component" and we put the 2 part numbers colored yellow in Step #1. Again the Step number and the note are optional.
Click on the part number you wish to color in the Smart Color window at the bottom then click the COLOR 1 P/N button then click the CHANGE COLOR button and select the color desired. When you have all the part numbers you wish colored then click FREEZE COLOR and that will freeze the colors on the display. If you wish you can print these out and if there's a unique step number then all the yellow colored components will print on a single sheet or if you don't wish to print paper then you can just blink by part number using the BLINK 1 P/N button on the screen to aid assembly and inspection.
Optionally you can also have
a Unisoft
library
that
indicates which
components need special attention as in this example that they are polarized. Using the library will speed this process up and
when you have a new design you can
import the
library and it will tag
matching
part numbers automatically on the assembly. At that point
it is
quick to color
the part numbers
accordingly.
Here is an example of
a
library:
385579-03-3 Yellow=2 pin polarized component
395422-01-9 Yellow=2 pin polarized component
391829-03-3 Yellow=2 pin polarized component
391809-01-6 Yellow=2 pin polarized component
391822-01-2 Yellow=2 pin polarized component
You can have as many libraries as you wish containing all different types of information.
Another option If you already have this type of information or
any
information on the part number in your MRP or ERP system you can export
it to the
Unisoft simple library format and then use that library
to
import into your PC boards.
An additional option is if you have information already in your Bill Of Materials (BOM) you can import that directly from the BOM into the Unisoft Operation Field using the BOM import feature.
OBJECT PROPERTIES WINDOW FOR
MANUAL COMPONENT PROPERTY CHANGES:
The Automatic Color Property changes explained above
are normally how process engineers color components however in special
situations you can use the
OBJECT PROPERTIES WINDOW to change
color,
etc.
if you have a unique situation for example where you
want to Color a single component or Color multiple components within a single
part number different colors. These changes are not restricted by part
number, step number, etc.
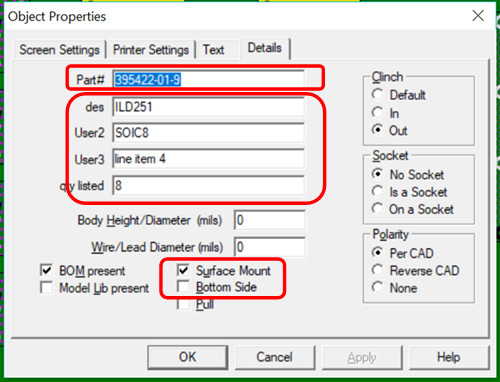
Additionally within the OBJECT PROPERTIES WINDOW you can change information for the component such as its part number, device type SMD/THD, location TOP/BOTTOM, outline colors, fonts, etc. So for example if a part number contains 4 components then each component can be assigned a unique color and font. These properties are then shown on the display and are also the properties printed via the PRINT ASSEMBLY DOCS by Step feature.
To change the color properties of a component first click the SELECTION TOOL then select the component or multiple components within a part number you wish to change. Next either type ALT ENTER or click the EDIT menu then PROPERTY. The SCREEN SETTING tab of the OBJECT PROPERTIES windows is displayed. Unchecked the USE DEFAULTS and at that point you can set the properties you wish then click OK.
We mentioned above that in the Object Properties window you can change
different types of information and below is an example of changing a part
number.
